6 Step Upfit Process
6 Step Guide to Upfitting a Work Van
A simple step-by-step approach to plan and build your work van. From interior protection to shelving, storage, and roof equipment, learn what to add and when, with easy-to-install solutions and expert support if you need it.
Step 1: Start with Interior Finishing
Start with liners and flooring to protect your van and create a solid base for your setup.
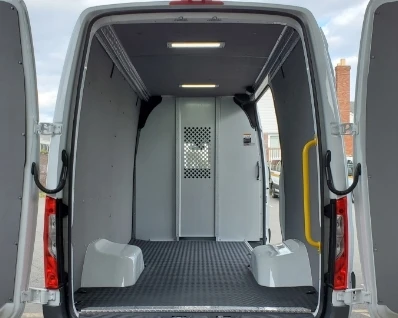
Interior Liners
Reduce noise and protect your van walls while creating a more durable, professional interior.
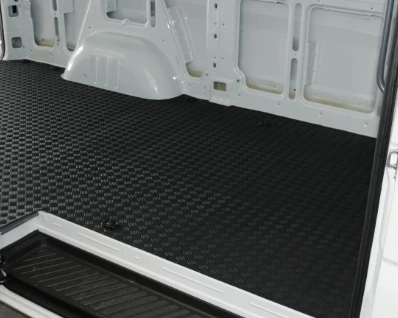
Floor Protection
Protect your cargo area and improve safety with flooring built to handle daily use.

Lighting
Improve visibility inside your van so you can work safely and efficiently in any conditions.

Interior Accessories
Add practical extras like wheel arch covers, seat covers, and lashing rails to finish your setup.
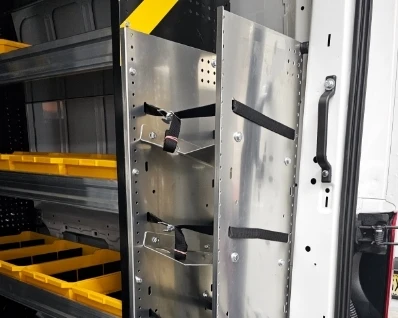
Step 2: Add a Safety Partition
Separate the cab from the cargo area to improve safety, reduce noise, and secure your equipment.
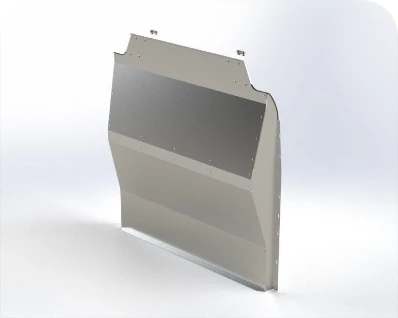
Solid Partitions
Create a strong, secure barrier between the cab and cargo area to protect the driver and keep equipment contained.

Partitions with Door
Maintain access between the cab and cargo area with a swing or sliding door option that fits your workflow.

Contoured Partitions
Maximize available space and improve comfort with a partition shaped to fit your van’s interior.

Security Locks
Add locking options to help secure tools, equipment, and stored items inside your van.
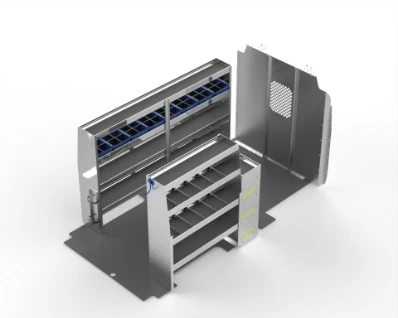
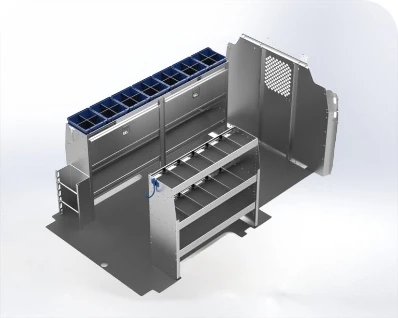
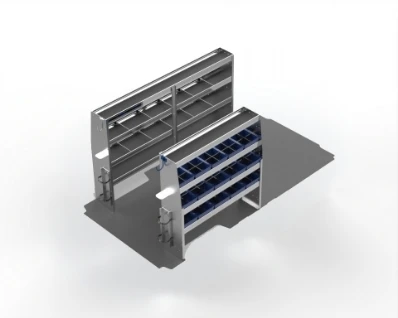
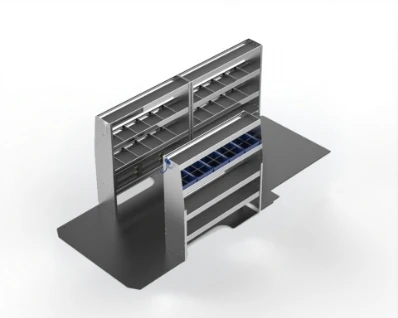
Step 3: Choose Your Shelving Package
Choose shelving based on your tools and trade. The right layout keeps you organized and makes better use of your space.
HVAC
Built for bulky equipment and varied tools, combining open shelving with bins to keep everything accessible.
Electrical
Designed for small parts and tools, using bins, dividers, and drawers to keep everything organized and easy to find.
Plumbing
Suited for pipes, fittings, and heavier materials, with a mix of open shelving and secure storage for tools.
General Service
Flexible setups for a wide range of tools, using modular shelving that adapts to different jobs and daily use.
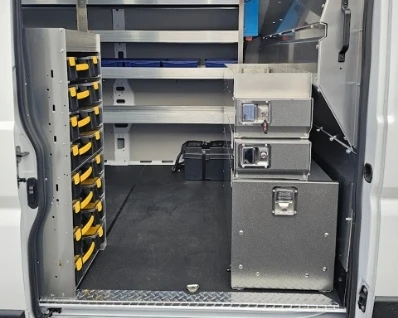
Step 4: Add Accessories
Stay organized and work faster with time-saving van storage accessories. Drawers, bins, and cabinets keep tools easy to access and in place.
Drawer Systems
Store tools securely and keep frequently used items easy to access throughout your day.
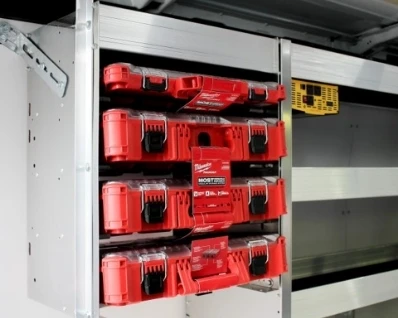
Parts Storage
Organize small parts with bins and compartments so everything has a place.
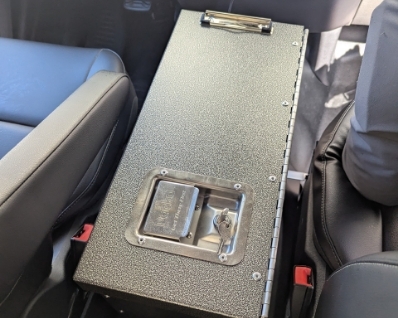
Cab Accessories
Add storage and protection to your cab with holders, organizers, and seat covers designed for daily use.
Bottle Holders
Cargo van bottle holders securely store and organize bottles, ensuring easy access and preventing spills during transit.
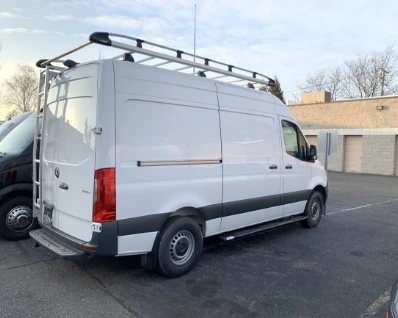
Step 5: Add Roof Equipment
Add roof equipment to carry ladders, materials, and long items safely. The right setup improves access, saves time, and frees up space inside your van.
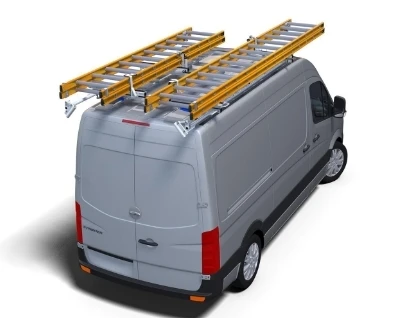
Dropdown Racks
Store and access ladders safely with ergonomic systems designed for quick loading and unloading.
Roof Decks
Carry more on top with durable, lightweight platforms that maximize roof space.

Cargo Racks
Secure materials and equipment with racks built for strength and daily use.
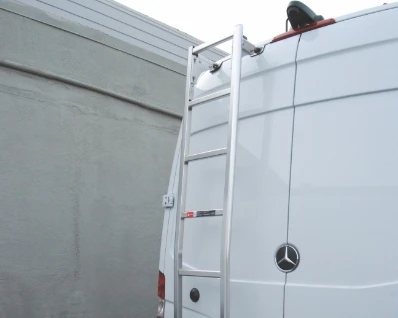
Additional Equipment
Add access ladders, conduit carriers, and other accessories to expand your van’s capability.
Step 6: Add Exterior & Protection Accessories
Finish your setup with exterior & protection accessories that improve access, safety, and overall functionality
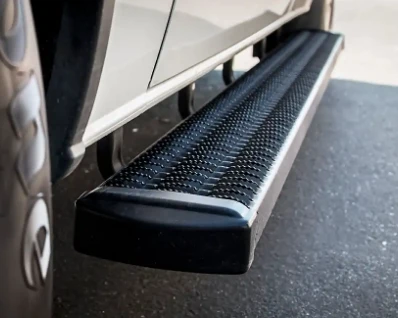
Running Boards
Make it easier to get in and out of your van with durable, high-traction steps.

Grab Handles
Add grab handles to improve access in and out of your van, especially when carrying tools or equipment.
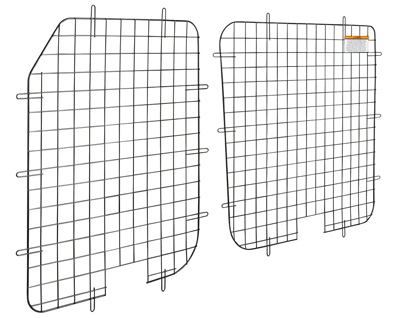
Window Guards
Add interior window guards to your van to protect glass from shifting cargo on the inside and deter burglary from the outside.
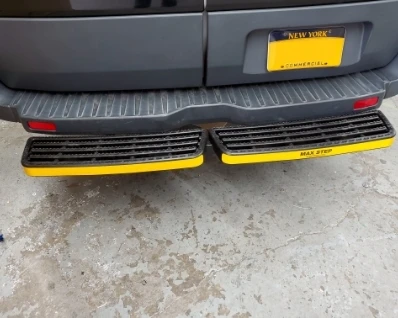
Rear Steps
Improve access to the cargo area with stable, heavy-duty rear steps built for daily use.
Plan Your Work Van with Confidence
Made for trades and fleet teams, find the shelving systems and resources needed to build efficient, work-ready vans.